
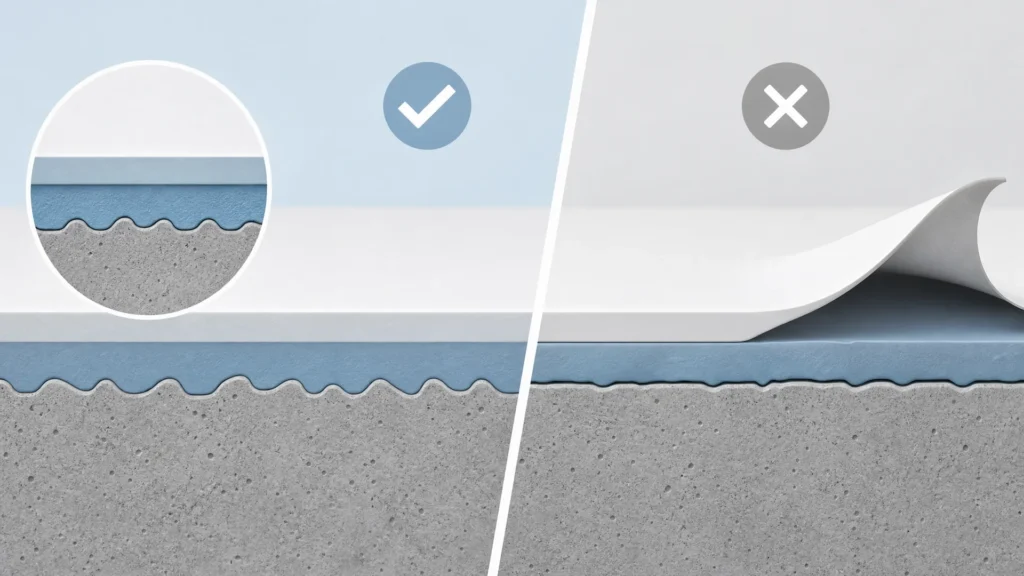
Painting preparation surface cleaning is the step most homeowners rush, and the reason most paint jobs fail before their time. Wilcote Cape Town’s renovation teams routinely encounter surfaces where previous paint jobs have failed within one to two seasons, and in the majority of cases the root cause traces back to inadequate surface preparation rather than product quality. Paint manufacturers broadly agree: preparation accounts for roughly 80% of the effort in any successful paint job. The coating itself is only as good as what lies beneath it.
This checklist walks through every stage in sequence, from inspection and contaminant removal to wall repair, primer selection, and timing, so that your next paint job lasts.
Why Surface Cleaning Before Painting Determines the Whole Job
Paint is a thin film. It cannot bridge structural weaknesses, and it cannot bond to a surface that is dirty, damp, chalky, or loosely adhered. When paint peels, bubbles, or flakes within a season, the failure point is almost always at the interface between the coating and the substrate, not within the paint itself.
This matters for every project type. A homeowner repainting a bedroom, a facility manager scheduling a commercial repaint, and an industrial operator maintaining a warehouse all face the same physics. Skip preparation and the product fails. Get the prep right and even mid-range coatings perform well beyond their rated lifespan.
The Painting Preparation Surface Cleaning Checklist (Step by Step)
Step 1, Inspect, Test, and Clear the Surface
Start with a methodical visual inspection before touching a scraper or brush.
- Check for damp. Press a moisture meter against the wall in multiple spots, or tape plastic sheeting to the surface for 24 hours. Condensation under the plastic confirms active moisture. Do not proceed until the source is resolved.
- Test for efflorescence. White, powdery salt deposits on masonry or plaster indicate moisture migrating through the substrate. Brush the deposits away and note whether they return, recurring efflorescence signals an ongoing damp problem.
- Check adhesion of existing paint. Press adhesive tape firmly onto the surface and pull it back sharply. If paint lifts with the tape, that layer must come off before you prime.
- Clear and mask the workspace. Move furniture, cover floors with drop sheets, and mask skirting boards, window frames, and fixtures with quality masking tape. Skipping this step contaminates surfaces you have already cleaned.
Cape Town’s coastal location adds a specific consideration here. Salt-laden air deposits chlorides on exterior surfaces, which accelerate paint breakdown and interfere with adhesion. Any inspection on a Cape Town exterior wall should include a close look for salt crystallisation, especially in areas exposed to the prevailing south-easterly wind.
Step 2, Removing Old Paint, Dirt, and Contaminants
Once you know what you are dealing with, remove everything that does not belong.
Scraping and sanding. Use a stiff scraper or wire brush to lift all flaking, peeling, or loosely adhered paint. Follow with medium-grit sandpaper (typically 80–120 grit) to feather the edges of any remaining paint so the transition is smooth. On exterior masonry, a wire brush attachment on a drill speeds this up considerably.
Washing. Mix sugar soap or a TSP (trisodium phosphate) substitute with warm water and scrub the entire surface, not just problem areas. This removes grease, smoke residue, mould spores, chalky paint residue, and salt deposits. On exterior walls, a garden hose or low-pressure washer works well for the rinse stage. Avoid high pressure on older plaster, which can fracture the surface.
Mould treatment. If mould is present, treat with a fungicidal wash before the sugar soap stage. Allow it to work for the manufacturer’s recommended dwell time, then rinse thoroughly.
Final dry. Allow the surface to dry completely, at minimum 24 hours in dry summer conditions, and longer after rain or in Cape Town’s wet winter months. Rushing this step is one of the most consistent causes of early paint failure.
Wall Repair and Surface Patching Before You Prime
Filling Cracks, Holes, and Efflorescence Damage
No primer or paint will disguise a crack. Every flaw in the substrate telegraphs through to the finished coat, often more visibly than it appeared on the bare wall, because paint sheen amplifies surface irregularities.
Hairline cracks. Rake out the crack slightly with a scraper or crack opener to give the filler a key, then press in a flexible exterior filler or skim coat. Sand flush when dry.
Larger cracks and holes. Deep voids need to be filled in stages, one thick application will shrink and crack as it dries. Apply filler in layers no thicker than about 6 mm, allowing each layer to dry before adding the next.
Efflorescence damage. After brushing off the salt deposits, treat the area with a diluted acid wash (such as a 10% hydrochloric acid solution) to neutralise the alkaline salts. Rinse thoroughly and allow to dry completely before any repair work. If efflorescence is recurring, the underlying damp source must be addressed first, read about damp walls and how to treat them before painting before proceeding.
Active damp patches. These must be treated at source before any coating goes on. Applying paint over an active damp patch simply traps moisture, which then forces the paint off the wall from behind.
Once all repairs are dry and sanded smooth, the surface is ready to prime.
Primer Selection: Matching the Right Product to the Surface
Primer is not optional. It is the adhesion layer that makes everything above it work. The wrong primer is almost as bad as no primer, because it may not address the specific chemistry of the substrate.
New plaster. Fresh plaster is highly alkaline. Standard primers can saponify (turn soapy) when applied to uncured alkaline surfaces, breaking down the paint system from the inside. Use an alkali-resistant primer and allow new plaster to cure for at least 28 days before any coating. On porous new plaster, a diluted PVA sealer applied first reduces suction and gives a more even primer coat.
Bare masonry and old brick. Masonry is porous and often uneven in density. A penetrating bonding primer improves adhesion and reduces differential absorption, which causes patchy, uneven topcoats.
Previously painted surfaces. If the existing paint is sound (confirmed by the tape test), a light sand to degloss and a coat of bonding primer is sufficient. If the existing paint is oil-based and you are switching to water-based, use a bonding primer specifically rated for that transition.
Damp-prone surfaces. Professional painting contractors consistently find that skipping a bonding or alkali-resistant primer on new or damp-prone masonry is the single most predictable cause of premature paint failure in South Africa’s coastal environments. For surfaces with a history of damp, use a damp-lock or alkali-resistant primer rated for the purpose, not a general-purpose product.
Paint Prep Techniques: Tools, Timing, and Environmental Factors
Having the right tools makes paint prep faster and more thorough. The core kit for surface cleaning before painting includes:
- Scrapers (flexible and stiff) for lifting flaking paint
- Wire brushes and wire-brush drill attachments for masonry and rust spots
- Sanding blocks and sanding sponges (80, 120, and 180 grit) for feathering and smoothing
- Sugar soap or TSP substitute and a bucket, scrubbing brush, and sponge
- Garden hose or low-pressure washer for exterior rinse
- Fungicidal wash for mould-affected surfaces
- Quality masking tape and drop sheets to protect clean surfaces
- Moisture meter for damp testing
Timing Drying Times in Cape Town’s Climate
Cape Town’s wet-season winters mean exterior surfaces can retain moisture for several days after rainfall. Starting a paint job during or immediately after rain, without allowing adequate drying time, creates micro-blisters that become visible within weeks as the trapped moisture expands and contracts with temperature changes.
In practical terms:
- Winter (May–August): Allow at least 48–72 hours after rain before starting exterior prep, and check moisture readings before priming.
- Summer (November–February): Drying is faster, but avoid painting exterior surfaces in direct midday sun. Rapid surface drying can cause the paint film to skin over before the deeper layers cure, leaving a surface that looks dry but blisters under the next heat cycle.
- Year-round coastal rule: Prime and topcoat in the cooler parts of the day, early morning or late afternoon, to give each layer the best chance to cure evenly.
For industrial building maintenance schedules, planning exterior painting for the Cape Town dry season (September–April) and building in adequate cure windows between coats significantly extends coating lifespan.
Common Prep Mistakes That Cause Paint to Fail
These are the errors that turn a well-intentioned paint job into an early remediation project.
1. Painting over damp surfaces.
The paint traps moisture beneath the film. As the moisture tries to escape, it pushes the paint off the wall. Result: blistering and peeling within weeks.
2. Skipping primer.
Without primer, topcoat adhesion depends entirely on mechanical keying to the substrate. On smooth or porous surfaces, this is rarely enough. The paint peels or flakes at the interface.
3. Not removing chalk or efflorescence.
Chalky, powdery surfaces have almost no adhesion value. Applying paint over them is equivalent to painting over loose dust. The new coat lifts along with the chalk.
4. Ignoring hairline cracks.
Small cracks move with thermal expansion and contraction. Paint bridging an unrepaired crack will re-crack within one season, allowing water ingress that accelerates the failure.
5. Painting in direct midday sun.
High surface temperatures cause the paint film to dry too fast on the outside while the interior layers remain wet. This traps solvents and creates a weak, blister-prone film.
6. Insufficient drying time between coats.
Each coat needs to reach the correct cure stage before the next goes on. Applying a second coat over a tacky first coat traps solvent and prevents proper film formation.
7. Rushing the wash-down and rinse.
Leaving sugar soap residue on the surface contaminates the primer layer. Always rinse thoroughly with clean water and allow to dry.
A real-world illustration of what happens when these steps are skipped: on a commercial repaint of an industrial facility, a seemingly sound wall with minor efflorescence was painted over without treatment. Within months the paint had delaminated in sheets, a costly remediation that could have been avoided with a thorough wash-down and an alkali-resistant primer. Commercial painting contractors in Cape Town familiar with these conditions build efflorescence treatment and primer specification into every scope of work precisely to avoid this outcome.
Done correctly, thorough painting preparation surface cleaning adds minimal cost but dramatically extends the life of the finished job, whether you are refreshing a single room or tackling a full exterior house renovation transformation. Methodical prep produces coatings that hold colour, resist peeling, and stay sound through multiple seasons.
If you would rather have a professional team handle every stage of the process, from surface assessment and damp treatment through to the final topcoat, Wilcote Cape Town offers professional house painting services in Cape Town for residential, commercial, and industrial clients. Contact us for a site assessment and painting quote, and get the prep right the first time.