
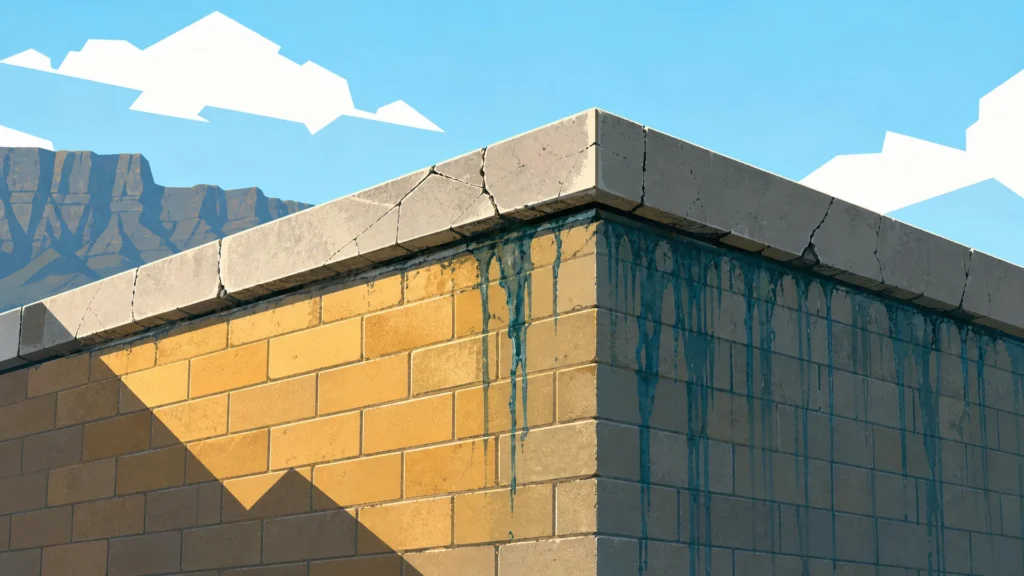
Most waterproofing articles focus on flat roofs. But in Cape Town, the leak that actually ruins ceilings and paintwork often starts somewhere else: the parapet wall. Parapet wall waterproofing in Cape Town deals with a different problem than roof membranes do, and it needs a different approach. Understanding why parapets fail, and what a correct repair looks like, can save property owners years of recurring damp and repeat call-outs.
Why Parapet Walls Are Cape Town’s Hidden Leak Point
A parapet wall stands taller than the roofline. It’s exposed on two or three sides at once. A flat roof is at least partly sheltered by upstands and drainage falls. A parapet isn’t. It takes direct sun on one face, wind on another, and rain on the capping above. That exposure wears down seals far faster than on a sheltered roof surface.
On a typical Cape Town home, the parapet wall is the only part of the building exposed to sun, wind, and rain on multiple faces at once. That’s why capping cracks and joint failures show up there years before the main roof membrane fails.
How Wind-Driven Rain and UV Cycles Attack Parapets
Cape Town’s climate is hard on parapets. Summer brings intense UV that dries out and embrittles old bituminous coatings and sealants. Winter brings the opposite: driving rain pushed sideways by wind, forcing moisture into joints that would stay dry in a calmer climate.
The city’s daily and seasonal temperature swings matter too. Concrete and brick expand and contract with heat and cold. Over years, that movement opens hairline cracks in the capping and stresses flashing joints until they lift.
The Cape south-easter makes this worse. It doesn’t just bring rain. It drives that rain sideways and upward, forcing water into vertical joints and under capping edges that a gentler, straight-down rainfall would never reach. That’s a big reason parapet wall leaks are so common across Cape Town, from Table Bay to the southern suburbs.
Common Signs of Parapet Wall Leaks and Damp in Cape Town
Parapet wall damp in Cape Town rarely announces itself clearly. Most owners notice the symptoms long before they identify the source.
Watch for staining or streaking on the wall below the parapet line. Bubbling or peeling paint on interior ceilings near external walls is another common sign, especially on the top floor. Damp patches that appear after wind-driven rain, but not after calm rain, often point straight to the parapet rather than the roof. White, powdery efflorescence on brickwork is a further giveaway. It means salts have travelled through the wall in moisture and been left behind as the water evaporates.
Cracked Capping and Failed Flashing
Capping is the horizontal cover on top of the parapet, and it takes the most punishment of any surface on the building. Hairline cracks in concrete or screed capping widen over time under UV and thermal movement, letting water straight into the wall core below.
Flashing, the metal or membrane detail that seals the join between the parapet and the roof or wall surface, fails in a similar way. Once it lifts, curls, or corrodes at the fixings, it stops shedding water and starts channelling it inward.
Open Joints and Damp Staining Below the Parapet
Vertical joints between capping sections, and the seams where old torch-on membrane laps have separated, are another common entry point. Wilcotec’s Cape Town crews regularly find that a leak blamed on the roof membrane actually starts at a cracked parapet capping or a lifted flashing joint several metres away. That diagnosis only comes from a proper on-site inspection, because water travels sideways through masonry before it shows up as a stain indoors.
This is why chasing a leak by patching the roof alone so often fails. The real source is up on the parapet, not on the flat surface below it.
The Correct Waterproofing System for a Parapet Wall
Parapet capping waterproofing works differently from waterproofing a flat roof deck. It has to manage a vertical or near-vertical surface as well as a horizontal cap, all meeting at exposed corners and joints.
A proper repair starts with surface preparation: removing loose material, repairing cracks, and making sure the substrate is sound and dry. Skipping this step is the single biggest reason parapet waterproofing fails early. No membrane bonds properly to a crumbling or damp surface.
Primer, Torch-On Membrane and Flashing Detail Explained
Once the surface is prepared, a bitumen primer goes on to help the membrane bond fully to the capping and wall faces. A reinforced torch-on waterproofing membrane goes on next, heat-welded into place rather than just glued or painted on.
This is the same family of torch-on waterproofing products used on flat roofs, but the application geometry for a parapet is more demanding. The membrane needs to dress over the top of the capping and run down both wall faces, not just lie flat. Every lap and joint has to be properly overlapped and heat-sealed, because a parapet has far more corners, upstands, and direction changes than a plain roof deck.
Flashing details at joints and terminations get sealed as part of the same system, not treated as an afterthought. A membrane that stops short of a proper flashing detail just gives water a new way in.
Parapet Capping Waterproofing Best Practice
Good practice treats the capping as a continuous, sealed cap rather than a series of separate patches. Joints get staggered and overlapped correctly, corners get reinforced, and the membrane is dressed far enough down each face to shed water clear of the wall below.
This layered approach, crack repair, primer, reinforced membrane, sealed flashing, is what separates a lasting repair from a temporary patch that reopens within a season or two.
Repair vs Full Re-Waterproofing: What Cape Town Property Owners Should Know
Not every parapet problem needs a full re-waterproofing job. A contractor can often spot-repair an isolated crack, a single failed flashing joint, or a small area of lifted membrane quickly and affordably.
Widespread cracking across the capping, several separate leak points, or a membrane that has clearly passed its expected service life are a different story. In those cases, patching one spot usually just pushes the leak to the next weak point along the wall.
Here’s a useful rule of thumb: if a contractor keeps returning to fix “new” leaks on the same parapet run, the membrane itself has likely reached the end of its life. At that point, full re-waterproofing costs less over time than a string of repeat repairs. It resets the clock on the whole system rather than one patch at a time.
Commercial vs Residential Parapet Wall Waterproofing Considerations
Parapet wall repair in Cape Town looks quite different depending on the type of building. A house typically has a single, relatively short parapet run, and the finish matters as much as the function, since it’s visible from the street.
Commercial and industrial buildings usually have a much longer perimeter, more access points, and higher safety requirements. Scaffolding or rope access, working-at-height compliance, and coordinating around tenants or operating hours all add complexity that a residential job doesn’t have.
What Body Corporates and Commercial Building Owners Should Expect
A commercial building with a long parapet run across a warehouse or retail roof needs a maintenance plan, not a once-off patch. A single missed joint can re-open a leak within one wet season, undoing months of otherwise sound work.
Body corporates managing sectional title buildings should expect a written scope of work, a clear cost breakdown per section of parapet, and a warranty on both materials and workmanship. Commercial owners should also expect the contractor to plan around business hours, minimise disruption, and document the work for insurance and compliance purposes. This kind of planning matters most on larger commercial parapet waterproofing projects, where a single unplanned callback can cost far more than the original job.
What Affects Parapet Wall Waterproofing Cost in Cape Town
Waterproofing parapet wall cost in Cape Town depends on several factors, and no two properties price out the same way.
The extent of existing damage matters most. A few cracks and one flashing joint cost far less to fix than a capping riddled with cracks along its entire length. The total length of parapet capping, and how easily it can be reached, also affects price. A single-storey home with easy roof access costs less to work on than a multi-storey commercial building needing scaffolding or harness access.
The membrane specification chosen, standard torch-on versus a heavier-duty reinforced system, also shifts the price, as does whether the job is a targeted repair or a full system replacement. Full re-waterproofing costs more upfront than a spot repair, but it usually delivers a longer service life and fewer callouts.
Choosing the Right Waterproofing Contractor
Because cost and quality vary so much between contractors, a short vetting checklist helps:
- Insist on a proper on-site inspection before any quote, not a price given over the phone.
- Ask for a written scope of work that names the products and system being used, not just a total price.
- Check whether the membrane and workmanship come with a warranty, and get the terms in writing.
- Ask for references or examples of similar parapet wall waterproofing jobs in Cape Town, ideally commercial ones if that’s your building type.
Cape Town’s climate gives parapets no rest: sun, wind, and driving rain all year round. Building waterproofing in Cape Town has to account for that reality. A parapet needs a system built specifically for its exposure, not a flat-roof product applied to a vertical surface and hoped for the best.
If your parapet wall shows staining, cracked capping, or damp patches on the top floor, get a proper diagnosis before the next wet season arrives. Wilcotec offers a free on-site parapet wall inspection and waterproofing quote for homes and commercial buildings across Cape Town, so you know exactly what’s causing the leak and what it will take to fix it for good.