
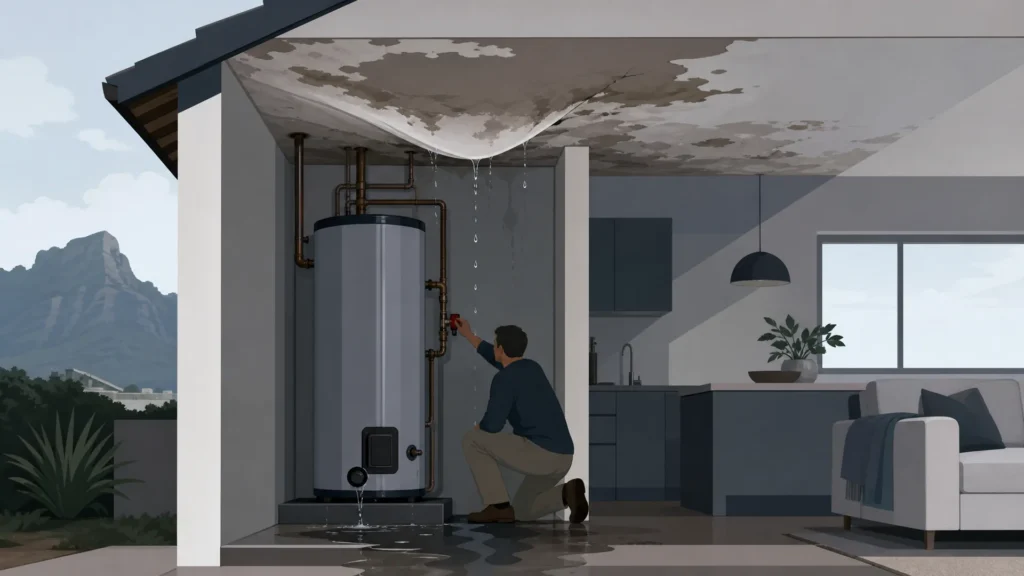
A burst geyser is one of the most disruptive things that can happen inside a Cape Town home. Water pours through the ceiling. Paint bubbles within minutes. A homeowner is suddenly juggling plumbers, insurers, and repair contractors at the same time. This guide walks through what to do in the first 24 hours, how ceiling and wall damage gets assessed, and where geyser damage waterproofing repair fits into the process in Cape Town alongside patching and repainting.
What to Do in the First 24 Hours After a Geyser Bursts
Speed matters, but so does safety. The first hour after a burst geyser sets the tone for how much damage spreads and how smoothly an insurance claim goes.
Water travels fast through ceiling voids. It doesn’t stay where it first appeared. The priority is stopping the flow, protecting people from electrical risk, and recording the damage before cleanup begins.
Shutting Off Water and Power Safely
Find the isolation valve on the geyser, or shut off the mains if you can’t reach it. This stops more water from entering the ceiling cavity.
Next, switch off the electricity to the affected area at the distribution board. Wet ceilings and light fittings are a real shock hazard. Never touch a light switch or fitting that has water pooling near it or dripping from it.
If the ceiling is visibly sagging or bulging, keep everyone clear. A saturated ceiling board can hold a surprising amount of water. It may come down without warning.
Photographing Damage for Insurance
Once the area is safe, take photos and short videos before you move furniture or start mopping up. Capture the ceiling stain, any sagging, water on the floor, and affected walls.
Insurers generally expect a documented, professional assessment and a written repair quote before they approve a geyser-burst claim. Getting photos and a clear scope of damage on day one speeds up payout and helps avoid disputes over what damage was pre-existing versus new. Note the date and time on each photo if your phone doesn’t do it automatically. Keep any receipts for emergency plumbing call-outs too.
Assessing Ceiling, Wall, and Floor Water Damage
What looks like a small stain on the ceiling is rarely the full picture. Water follows gravity and gaps, not straight lines. It often travels well beyond the visible mark before it ever shows through paint.
A typical Cape Town burst-geyser scenario looks like this: water tracks along the ceiling void, pools above the cornice, and drips through a light fitting or seam long before a stain becomes visible. By the time a ceiling board actually sags, the insulation and the top plate above it are usually already saturated.
That’s why a proper assessment checks more than the obvious wet patch. It should cover the full ceiling area, the cornices, adjoining walls, and, in double-storey homes, the floor and ceiling below.
Signs the Ceiling Needs to Come Down
A few signs tell you a section of ceiling is beyond saving. Sagging boards, visible bulging, or a soft, spongy feel when gently pressed all mean the board has lost its structural integrity.
Gypsum ceiling boards that have stayed saturated for more than a day or two typically need to be cut out and replaced rather than dried and repainted. The paper facing delaminates, and the board loses strength permanently. Bubbling paint and a persistent musty smell are also strong indicators that water sits behind the surface, even if the stain itself looks small.
When Walls and Floors Are Also Affected
Once the ceiling has been saturated, check the walls below it and to the sides. Water can run down inside the cavity and show up as damp patches, peeling paint, or soft plaster lower down the wall.
In double-storey homes, always check the ceiling and walls of the room below a geyser location too, even if nothing looks wet yet. Timber floors, laminate, and skirting boards can also absorb water that pooled at floor level. It’s worth lifting a corner of carpet or checking behind skirting where water was seen collecting.
It’s worth distinguishing this kind of sudden, sourced damage from ongoing rising and penetrating damp in walls, which needs a different diagnostic approach and a different fix.
Geyser Damage Waterproofing Repair Cape Town: Why Waterproofing Comes Before Repainting
This is the step homeowners most often get wrong, usually because they’re in a hurry to make the house look normal again. Patching and repainting a water-damaged ceiling without sealing the source first is a short-term fix that almost always fails.
If the geyser overflow drain, roof penetration, or plumbing joint that caused the burst isn’t properly sealed, moisture keeps finding its way back into the same ceiling void. New paint and plaster don’t stop water. They just hide the next leak until it stains through again, usually alongside mould growth.
Sealing the Source Before Cosmetic Repair
Correct sequencing means waterproofing and leak-sealing happen first. Drying and structural repair happen second. Cosmetic work, skimming, sanding, and painting, happens last.
Depending on where the geyser sits and how the water travelled, this can involve resealing pipe penetrations, waterproofing a geyser drip tray and overflow route, or addressing a section of roof if the geyser is housed in a roof space. Where the affected area includes a flat roof section, it’s worth understanding how torch-on waterproofing compares to other methods before deciding on the right approach.
Skipping this step to save time is the single most common reason homeowners end up paying for the same ceiling repair twice within a year.
Repairing and Repainting Water-Damaged Ceilings and Walls
Once the source is sealed and everything has had time to dry out properly, the cosmetic repair sequence can begin. Rushing this stage traps moisture behind fresh paint, which defeats the purpose of waterproofing in the first place.
Ceiling Board Replacement vs Patch Repair
Small, contained water marks on an otherwise sound board can sometimes be sanded, sealed with a stain-blocking primer, and repainted. But once a board has sagged, delaminated, or stayed wet for more than a day or two, it needs to be cut out and replaced.
A cut-out repair involves removing the damaged section back to the nearest support, fitting a new board, taping and skimming the joints, and sanding the area flush before priming. Matching the ceiling texture and level takes care, especially where the old and new boards meet.
Matching Paint and Finish After Repair
Stained areas need a proper sealing primer before topcoat, even if the ceiling paint looks like a simple white. Skip the primer and the old stain can bleed through weeks later, no matter how many coats go over it.
Matching wall paint after patch repairs also takes attention to the original finish, sheen level, and colour batch. For homeowners planning the full cosmetic side of the job, an interior painting cost guide is useful for budgeting the repaint alongside the structural repair.
Insurance Claims and Getting a Contractor Quote
Most household insurance policies in South Africa cover sudden and accidental geyser bursts, including the resulting damage to ceilings, walls, and floors. Whether cover extends to the geyser itself often depends on its age and maintenance history. It’s worth checking your policy wording, particularly around wear-and-tear exclusions.
Many geysers in Cape Town’s older suburban housing stock are 10 to 15 or more years old. That’s roughly the age range where tank corrosion and pressure-valve failure become the most common causes of sudden bursts, so insurers pay close attention to geyser age when assessing a claim.
Costs vary a lot depending on how much ceiling needs replacing, whether walls and floors are affected, and how much waterproofing work the source of the leak requires. Rather than guessing at a figure, get a written, itemised quote from a contractor who has actually inspected the damage.
What a Proper Damage Quote Should Include
A proper quote should separate out the waterproofing or leak-sealing work, the structural ceiling and wall repair, and the repainting, with each priced individually. That itemisation matters for two reasons.
It gives your insurer a clear breakdown to assess against the claim, and it shows you exactly what you’re paying for at each stage. A vague, one-line quote that just says “ceiling repair” makes it hard for either party to verify the scope. If the geyser sits in or near a roof space, it’s also worth comparing against what a roof leak repair quote should include, since the assessment principles overlap closely. The same applies to bathroom waterproofing done properly if the burst occurred near a bathroom geyser installation.
Preventing Repeat Damage: Mould, Structural Risk, and Choosing the Right Contractor
Water damage doesn’t wait patiently for you to get a few quotes. The clock starts running the moment the ceiling gets wet.
Why Delaying Repairs Risks Mould and Structural Issues
Mould can start developing on saturated gypsum board and timber within 24 to 48 hours of sustained moisture, especially in Cape Town’s humid winter months. The longer a ceiling stays wet, the more likely mould spreads into the roof timbers and insulation, not just the visible board.
Beyond mould, prolonged moisture weakens timber trusses and ceiling battens, which can turn a cosmetic repair into a structural one. Cracked render on affected exterior or interior walls is another common knock-on issue, and repairing cracked render on affected walls usually needs to happen before repainting can hold properly.
One Contractor for Waterproofing, Repair, and Painting
Coordinating a plumber, a waterproofing specialist, a ceiling contractor, and a painter separately is possible, but it’s slow. Every handover between trades is a chance for miscommunication about what’s actually been sealed, repaired, or primed.
Wilcote’s teams handle waterproofing, structural repair, and painting under one contract. A burst-geyser job goes from wet ceiling to repainted, sealed surface without homeowners having to coordinate three separate trades themselves. If your geyser damage also touches roof areas, it’s worth reading up on flat roof waterproofing options and costs to understand the fuller picture before repairs begin.
If your geyser has burst recently, or you’re still dealing with a damp ceiling and stained walls, don’t wait for it to get worse. Get in touch with Wilcote for an urgent inspection and a single, itemised quote covering waterproofing, ceiling and wall repair, and repainting, so the job gets done properly the first time.